Have you seen the YouTube videos of people putting together miniature DIY house kits and dollhouse furniture from kits like the ones from Cutebee, or Robotime? I thought this would be fun to try, and maybe even a cute setting to display 7 inch dolls in.
However, what I didn’t realize was that these kits are really small. Way too tiny for my dolls to live in. So I fixed that by recreating my own version of CuteBee’s Blue Times house in larger scale.
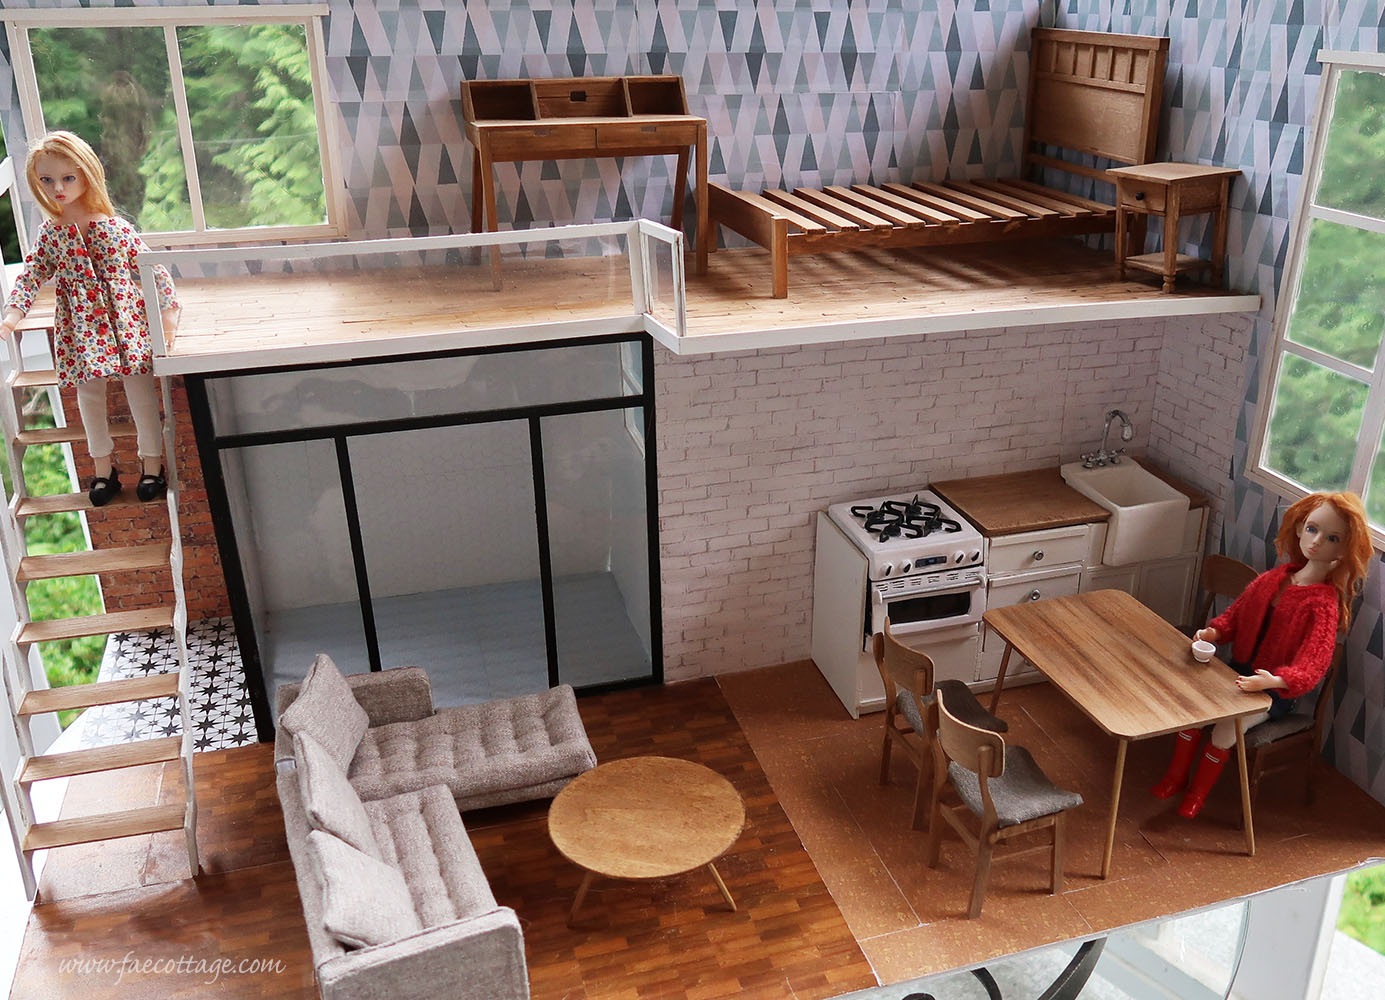
Floor Plan and Dollhouse Furniture
This isn’t a step-by-step tutorial, but in this post I’ll explain exactly how I created a larger version of the Cutebee miniature house. Also, I have created tutorials some of the dollhouse furniture, such as the night stand, the table and chairs, and the stove. They will be on my website, or intutorials in blog posts soon, I promise.
In addition, I’ve made a pattern with the dimension of all the pieces, and a supply list. You can get this right now by just signing up for my email list! (link)
How My Mom Inspired Me to Live a Creative Life
When I was a girl, I really wanted a big dollhouse. Instead, my mom helped me make one out of 2 cardboard boxes stacked one above the other. It wasn’t as nice as the amazing things I see people creating from these miniature DIY house kits in online videos today, but we had fun working on it together.
As we constructed it, she told me about the box houses she and her sister had made as girls. She grew up during the depression, and even though her dad was never out of work, not many middle class families had extra money for expensive toys.
She described how they got fabric and wallpaper samples from the Sears catalogue. These were used these to paper the walls, and for curtains and upholstery. Some of the dollhouse furniture was constructed from waste plastic food containers. My clever grandmother could make all sorts of amazing craft projects from recycled products!
There is satisfaction in making something yourself that you don’t get from buying it at the store. In addition, there’s fun in figuring out how to make something yourself.
My First Miniature DIY House Kit

When I opened my CuteBee house kit on on Christmas morning, I was a little disappointed it was so small! It did say 1/24th on the box though. Also, the dollhouse furniture was rather cheaply and factory made. Not the nicest quality.
So I put it on the shelf in my craft room. However, I kept thinking about what a lovely setting it would make my dolls, if only it was bigger. My 6-7 inch dolls would have loved living there.
How I Copied the Tiny House and Made It Bigger
So last month, I decided to make a bigger house, and use the Blue Times house as a pattern. But since most of my hand made dolls aren’t to scale, first I had to figure out just how big to make the tiny house.
Also, since I wanted my little house to look just like the one in the picture, I had to figure out how to copy the wall paper.
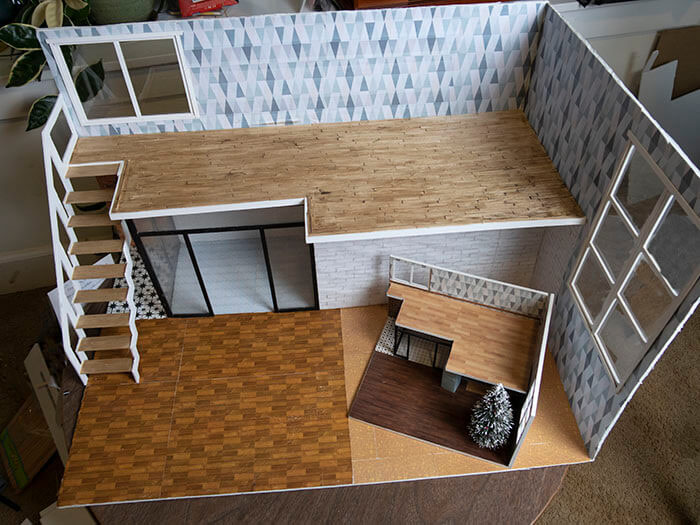
The house in the kit is made out of very thin wood, but I decided to make mine from foam board instead. I used one full sheet of foam board for the back and another for the floor, that way I only needed to cut the pieces for the side wall and the top floor. The walls were glued together with PVA glue that I purchased online
In addition, I purchased some wood stripes at the hardwood store to make the frames around the windows. Before gluing them in, I painted them with white acrylic paint. For the “glass” I used plastic cut from the lids of large lettuce containers. (I don’t recommend doing this though. You can buy clear plastic in a craft store that’s much nicer.)
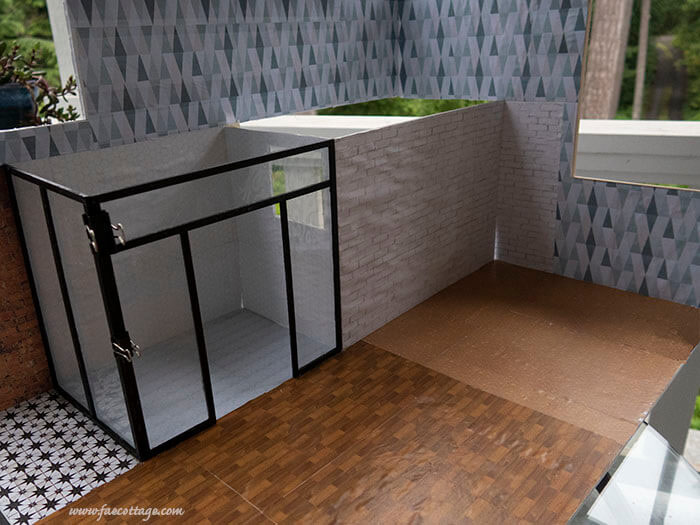
On to the Walls And Flooring
The wall paper was a little tricky. First I tried scanning the paper that came with my Cutebee kit. I scanned it into Photoshop, and spent a couple of hours trying to get the small
Instead of scanning the flooring from the Cutebee dollhouse, I looked at flooring online, and made screenshots of some images. I decided to use printed cork for the kitchen floor, and wooden flooring for the living room.
I copied a tile pattern for the bathroom and edited it in Photoshop. and the small tiles cut and pasted into larger sections to print. At the craft store, I bought several sheets of scrapbook paper for the brick walls, and the
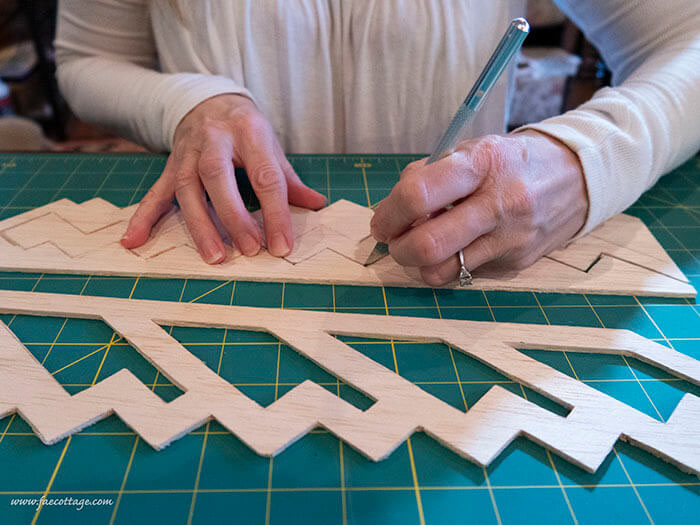
For the upstairs floor, I tried something different. I found some craft sticks at the hobby story, and thought it would be a good chance to try cutting something simple on my husbands scroll saw, although these could have also have been cut with a craft knife.
However, the electric saw saved my hands! I think I cut over 100 pieces. And also gave it gave me confidence in using the scroll saw for more difficult projects in the future.
Cutting a Staircase that Actually Fits the House
Last Christmas when my husband and son asked what I wanted, to asked for one of the miniature DIY house kits. The one I choose was from CuteBee. It was called Blue Times, number L-023.
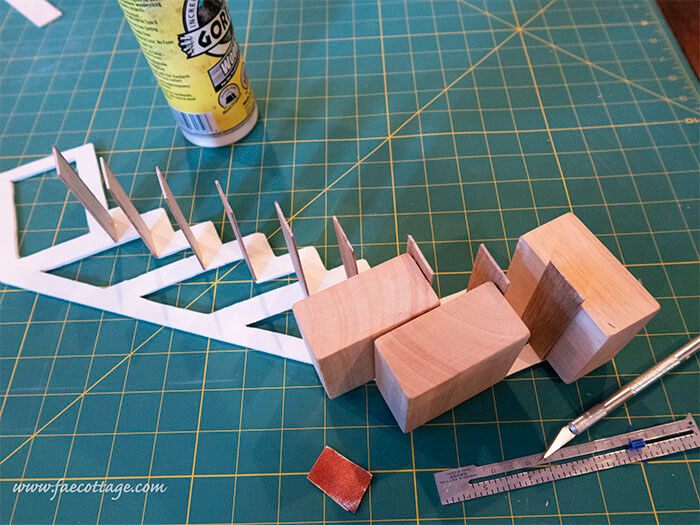
So far, the most difficult part in enlarging my Cutebee miniature DIY house kit has been figuring out the staircase so that it fit. So do this, I measure the diagonal from the top of the staircase to the floor. I traced the Cutebee stair railing, scanned it, and enlarged by 2.5. Lucky guess! It fit perfectly when I printed out the pattern and taped it together.
Back to the hardware store, where I purchased to sheets of base wood. Base wood is a really soft wood that is easy to cut with an x-acto blade. But it also is quite fragile and wants to separate if you put too much pressure on it when cutting.
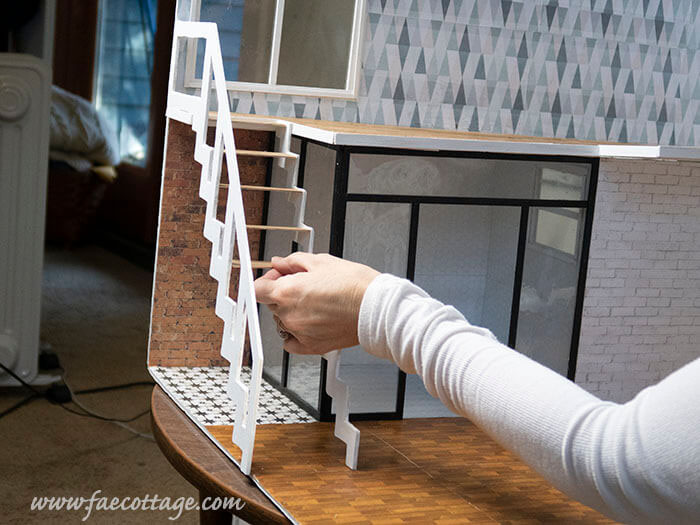
It took 2 days to cut and 2 coats of paint, but my stair railing is ready to go into the house. I first glued all the steps in place.
What’s Left to Finish on my Miniature DIY house
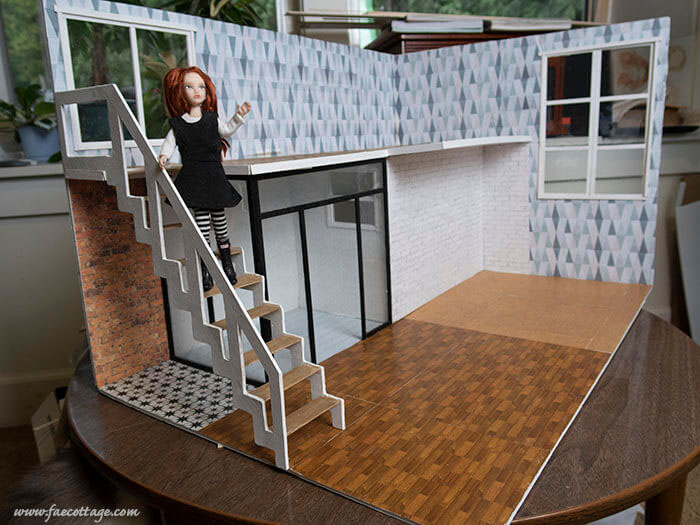
The stairs are now in, I started the upper floor, and glued some extra railings around the top edges. But I’m far from finished.
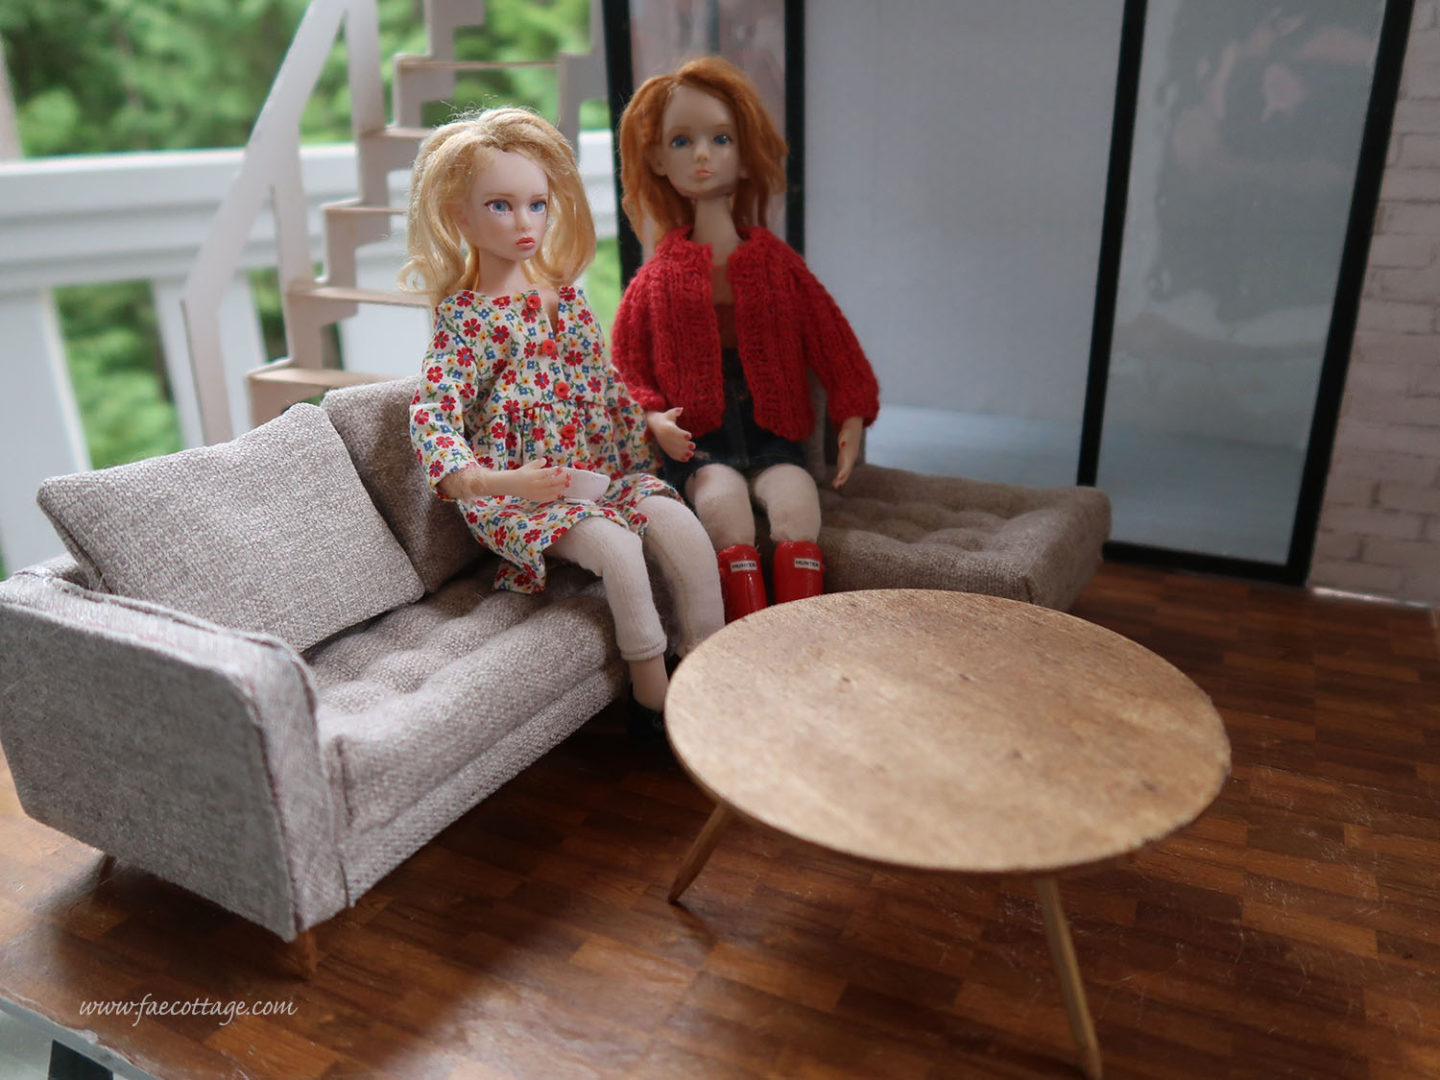
For the kitchen counter, I plan to use more of the base wood I used fir the stairs, and follow a tutorial I found on YouTube. I also found a tutorial from a different artist for a mid-century style sofa. And another great tutorial for making a bed.
A lot of the objects I plan to make from polymer clay, which I’m also using to create dishes for my larger dolls.
The lighting is still undecided. It’s probably not too late to run wires up the back to add some electric lighting to the house, but I can probably also find battery operated lights at Hobby Lobby.
Why Not Try Making Your Own Miniature DIY House?
Whether you purchase a kit from Cutebee, Robotime, or others, or do as I did, and create your own inspired by these kits in whatever size you choose, making a miniuture house is a lot of fun! And it’s easier than you think. Even the stairs! You can start off by watching some of the miniature DIY house videos online for inspiration.
Here are the steps I took to create my house:
- Trace out the kit pieces and scan onto your computer. You can use a software like Photoshop to enlarge your pattern.
- Gather your materials. You will need foam board, a cutting tool, a ruler, glue.
- Start with the flooring and wall paper. You can either use scrapbook papers from the craft store, wood craft sticks, or create your own on your computer. (Many libraries allow you to send print jobs to their color printers, and then pick up your pages.)
- To create the windows, use thin sheets of plastic. You can use lids from plastic containers, the clear plastic in report covers, or a heavier plastic. I framed out my windows, and then glued the plastic on the back side.
I’ll be making a second house soon, however, I think I’ll create my own floor plan next time. Perhaps if anyone is interested, I’ll create a pattern and step by step instructions. But before I start that next house, I have some more dollhouse furniture to finish!