If you’ve been looking at my photos on the blog, you’ve probably noticed that there is a lot of water in the background. There are some photo shoots at the beach too. That’s because we live on an island! And if you want to get back to nature, what better place to live? My home here even inspired the name of my blog, Fae Cottage.
Living on an island is not as cozy and lovely as it sounds. Well, sometimes it is, but other times we sit in a long ferry line of tourists to get home after a day of shopping. When we first moved here, the alarm rang at 4:30 in the morning so my husband could commute to his job in the city. (But thanks to two years of lock downs, he now just commutes to his office in the basement.)
Getting Back to Nature Right at Home
But other times it is so lovely, quiet, and peaceful, I wouldn’t want to live any place else. When I see people writing about how to get back to nature, I don’t have to read on. I already live in the middle of a forest. How much more back to nature can you get than that?
We never intended to move to an island. Our friends lived here though, and sometimes I would think as we were leaving to return to the city, “Wouldn’t it be nice to just live here?” They always say, be careful what you wish for…
Then one day when we’d had enough of sharing a driveway with not so nice neighbors, our friend from the island just happen to email us that there was a piece of property near them for sale. They thought we should look at.
So on Saturday, we drove up. The property they had seen wasn’t right at all, and neither was the next one, or the next one we looked at. But before we drove back to the ferry, we decided to look at one last place. We drove down a gravelly, winding, dead-end road. And before we even got out of the car I said to my husband, “This is it!”
The salal and the huckleberry were so thick, our real estate agent fell down several times showing us the property. My husband turned to me and said, “Are you sure you want to get this back to nature?”
I looked around. “Do you see any neighbor’s houses?”
“No,” he said.
“Then yes, I really do want to get this back to nature.” And actually, we have lovely neighbors here. We just don’t see much of them.
Not Everything is a Sign
I learned this the hard way. Sometimes things you think are signs, like our friend emailing us that day, are just a coincidence. But we have been happy here for almost 15 years. Also, we’re lucky to have amazing old growth forest state parks nearby. I love taking long walks there with my dog year round
We’re islanders now, who talk about how to avoid the longest ferry backups when going over to the mainland, and look forward to the end of tourist season so we can have our quaint village to ourselves again. The other day I saw a bumper sticker that said, “Slow down, this ain’t the mainland!”
These are the things I love about Living on an Island
I never worry whether I’ve forgotten and left the car or house unlocked.
Even though we have the best neighbors now, we can’t see any other houses from our property
The beach is just a 15 minutes drive away.
We hike trails and visit parks several times a week.
It’s so quiet and the air is really clean
People are truly nice here.
When I’m outside in my backyard, I have no neighbors looking over the fence to see what I’m doing. It’s weird to me now how noisy people in the suburbs are. And neighborhood gossip! Just, no.
I love the privacy of living in the forest. It would be hard to go back to a normal suburban neighborhood without feeling like I’m in a fish bowl. And even though I write a blog, I love being also to share only what I choose about my life. No one stops by my house unexpectedly either, which is nice.
Not much to do. We have one small movie theater in the village that gets movies a couple of months after they are released.
The schools are not the greatest, and it seems like the best teachers leave for more pay elsewhere.
Mostly it’s the ferry lines. They keep me from going to the mainland very often. It’ hard to get home again when people from the city are headed out to get “back to nature” near my backyard! But when I’m in the city, the drivers are so crazy! I can’t wait to get home again. I think I prefer ferry lines to freeway backups.
You’re Happiest Where You Make up Your Mind to Be
My mother used to say something like that to me when I would beg her to let me change schools. I hated it then, but I’ve come to realize she was right. Even though there are things that I miss about living in the city, such as:
I loved buying a latte and browsing the magazines on a rainy afternoon at Barnes and Noble.
Shopping for craft and sewing supplies at the fabric store.
Dining at a nice restaurant for lunch I haven’t been to before.
I miss Indian food.
Going anywhere without making it an all day trip.
We do think about moving somewhere else, and someday we might move far from here. But for now, I’m happy getting back to nature here in my own forest, and knowing that I can go to the beach if I want to.
All across the country last fall, parents woke up to the fact that schools would not be returning to normal. Were you like me, a mom looking forward to free afternoons to practice your favorite craft? I love to paint with watercolors, however, it’s something I don’t have a lot of time for.
Whether you have been home schooling this year, or you are a teenager, like my son who is being home schooled, I hope you remember to make creating art part of your lessons.
Below are some simple exercises to get yourself used to working with watercolors, without the intimidation that many of us feel at the idea of creating your first painting. I recommend you try some of these first, and then tackling that first painting will seem much more simple.
I think art is so important for children, especially teenagers. Yet, schools have for many years been cutting their art budgets, despite studies showing that creating art helps in so many other areas of study including the sciences and math.
One of the reasons we returned to home schooling was because my son’s high school replaced an experienced, respected art teacher with a less qualified instructor who had no training in teaching multiple levels at the same time, which left the more advanced students on their own for most of the class period.
So do not think you can’t teach art at home, even to a teenager, because you can probably do a better job than many schools out there.
And if you want to learn art on your own, whether it’s drawing, watercolor painting, or sculpting, now is the perfect time.
I’ll be posting more beginner tutorials to help you get started in the next few months!
Painting with watercolors isn’t that scary. You just need a plan and some supplies.
In coming up with our own art plan last year, I questioned my son about how the art teacher he had liked so well when he was attending the high school full time had organized his class. He said, “Primarily we did sketching, but we learned to paint with watercolors, and sculpt with water based clay”
So that’s what we do also. Except we use polymer clay since we don’t have an expensive kiln to fire things in. Oh, and some Copic Markers too, because we both love Manga and Anime!
Start with These Easy Watercolor Techniques
I’ve been drawing for over ten years, but it wasn’t until last year that I really started learning to paint with watercolors.
Even though I’d taken a color theory class with a local artist, and another class taught at my neighborhood library, the complexity of painting still scared me, as well as the fact that watercolors are not the most forgiving medium.
I decided to start simple, paint with a limited pallet, and learn one technique at a time.
Many beginning high school art classes begin teaching watercolor in the first semester, so don’t feel like you need to put off painting until you or your teen’s drawing skills reach a certain level. The main thing is not to feel overwhelmed learning too many new skills at once.
Teaching watercolor along with drawing will keep your interests higher! I love to draw, but when I’m working on a painting, I really start to feel like an artist.
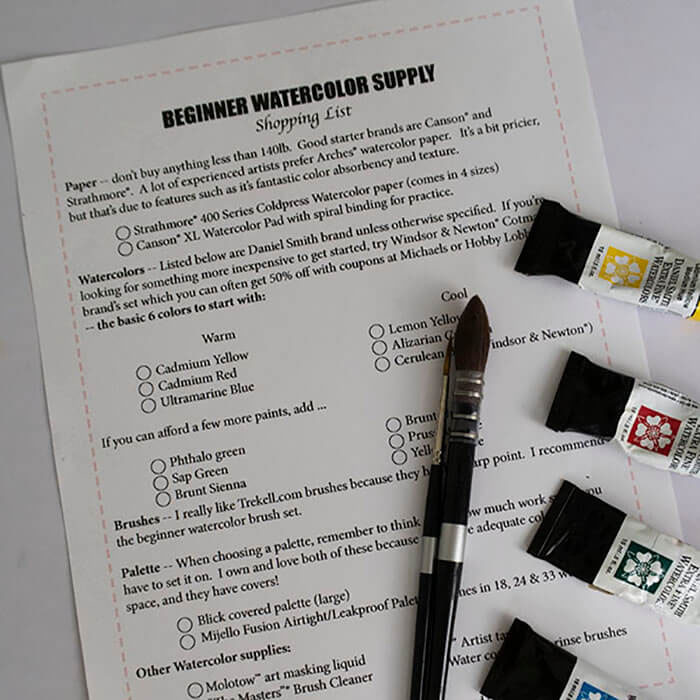
So whether you’ve always wanted to learn to paint with watercolors, or you will be homeschooling a teenager this coming year, and want to teach them traditional art methods, start simple like I did, and remind yourself that mistakes are part of learning. To discover what you need to get started, download my Beginner Watercolor Supply Shopping List.
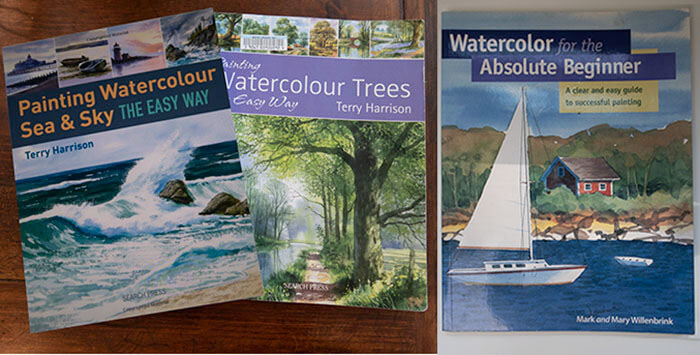
3 Books to Help you Learn or Teach Basic Watercolor Techniques – Check Your Library for Lots More
The first book I purchased when I started learning to paint with watercolors was this one: “Watercolor for the Absolute Beginner”, by Mark and Mary Willenbrink.
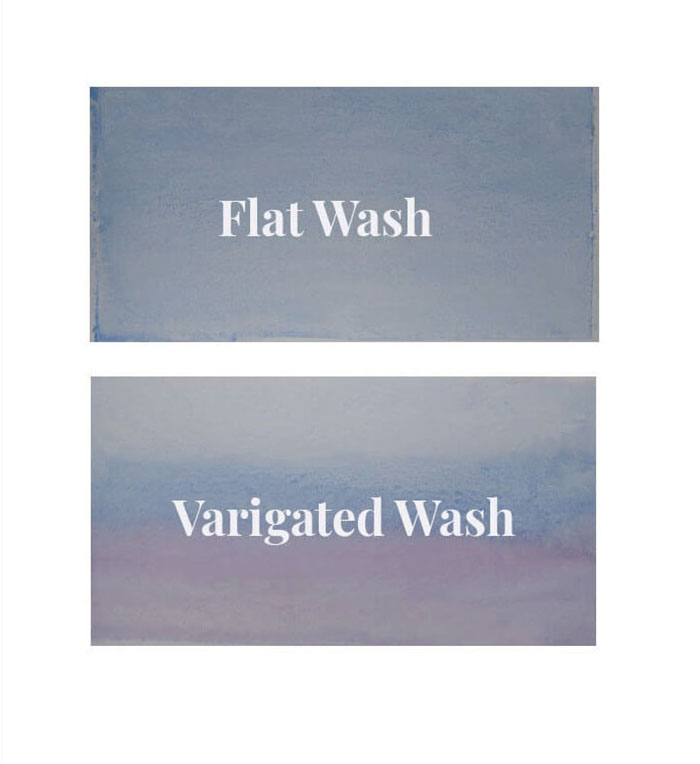
While I didn’t exactly do any of the step-by-step paintings, I did learn a lot about different washes. A watercolor wash is one of the basic watercolor techniques beginners learn. Diluted paint is applied to a large area of the painting either as a flat or variegated wash to achieve a smooth result. It’s often used for backgrounds or skies.
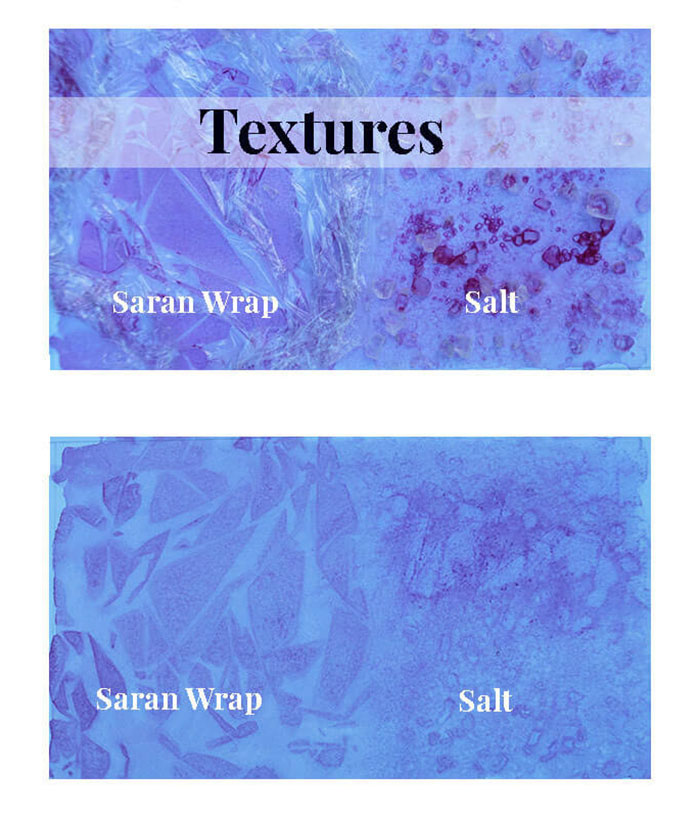
This book also teaches how to add texture with salt, plastic wrap, or aluminum foil to make an impression in the paint.
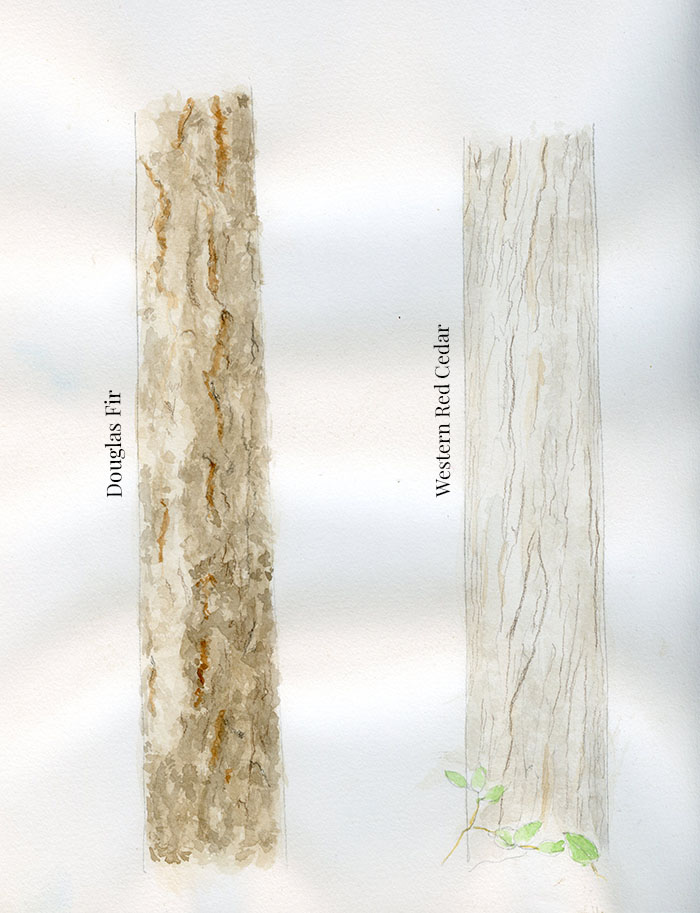
Next, I checked out a book from the library, “Painting Watercolor Trees” by Terry Harrison. When one lives in the forest, painting trees seems a must! Recently, I purchased another of Terry Harrisonbooks – this one is entitled, “Painting Sea and Sky.
But what I love to paint most is portraits. Unfortunately, I haven’t found any books to recommend. The best ones I found were for acrylic paints. However, I have watched some YouTube and Instagram videos. Mostly I’ve learned by trial and error, and lots of practice.
If you want to get good at something, try to practice it everyday.
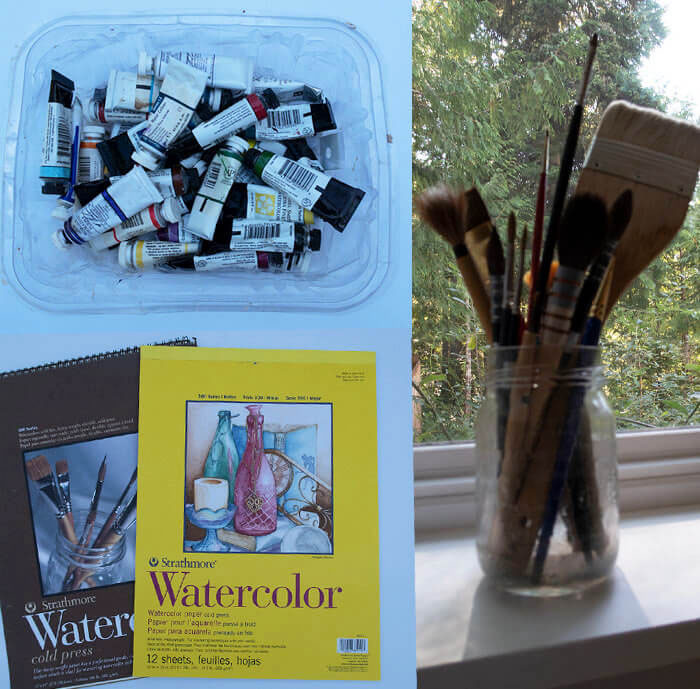
Paint with watercolors Must Have Items
1. Paper
Watercolor paper comes in various weights and textures. Paper that is at least 140lb holds up better through layers of washes and blending.
Another choice to make is whether to use coldpress or hotpress paper. Coldpress paper has a rougher texture, and is more forgiving of mistakes, and easier to blend when you are just learning. Hotpress has a smooth texture. Some painters can achieve an almost photo-like effect with it. There is also Rough, which has the most texture.
2. Brushes
I have a lot of brushes because the books I first read on watercolor painting told me I needed them. But I mostly only use a few regularly. For example on a portrait I recently painted I only used a round 2, round 4, and a 0 quill mop brush. For most all of my paintings I wet the paper at the beginning with a 3” flat brush. Some people insist that animal hair brushes are better, such as sable and squirrel. While I’m not a card carrying member of Peta, I don’t think animals should be killed when synthetic products can be used instead with almost similar quality.
3. Paint
There are two grades of watercolor paint, student and artist. The difference between the two is the artist grade has more pigmentation, and the colors are more vibrant. Also, professional grade are just easier to control. They are a bit pricier but it’s due to using professional grade materials. A bright spot is that a tube of watercolor paint lasts a long time.
If you’re looking for something more inexpensive, Windsor & Newton has a student grade line called Cotman. You can get a set of 12 for around $30, and sometimes find them ½ off with a coupon.
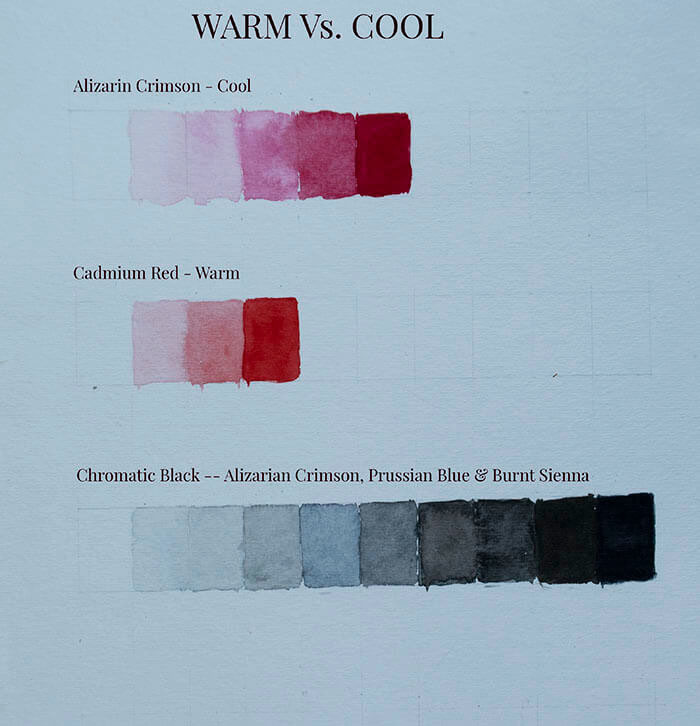
It’s fine to start with as little as 6 colors: 3 primary warm colors, and 3 primary cool colors. If you want to paint skin tones you will also need burnt sienna.
For a complete list of materials to get started with, check out my Beginner Watercolor Supply Shopping List which you can download, and take with you to the art store, or when shopping online. Check off supplies as you add them.
These are the basic colors you need to start painting with watercolors:
Primary colors, red, yellow, blue – in both warm and cool tones
AND if you have a bit more money to spend:
Warm and cool greens
Two browns
What do I mean by warm and cool color, you might be wondering. As one artist said, it’s all relative. Cool tones have more blue undertones, warms have more yellow-red undertones. So for example, with the color red, Cadmium red is more orangey, and Alizarian Crimson more blueish.
One more thing I want to mention before we move on to talking about the rest of the supplies is color mixing. Color mixing is a whole talent unto itself. It takes a lot of experience to mix the same color multiple times. Or to know which red and blue make the shade of purple you are looking for. But there are lots of books and online guides to color mixing!
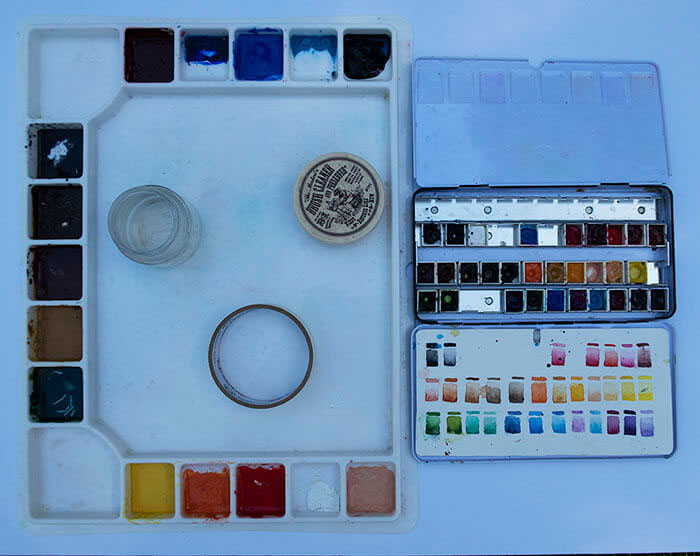
4. Other supplies
Aside from these, you will need a pallet, watercolor tape, paper towels or Kleenex, brush cleaner, and a jar to hold your brush rinsing water.
This will get you started, and if you’re like me, you’ll continue adding more colors over time. Watercolor paint lasts a long time. Some of my paints are over 10 years old. They had all dried out in their tubes when I decided to paint with watercolors again. But I cut open the tubes, re-hydrated the paints, and they still work just fine.
I love to paint with watercolors! It’s fun and challenging, and if you are wanting to learn yourself, or as part of a home schooling art curriculum, now is the best time.
Making art together has really created a close bond between my son and me. Don’t let hesitations stand in your way, or fear, otherwise you could end up looking back ten years from now wondering why you didn’t start sooner. Remember, just start simple, paint with a limited pallet at first, and explore one technique at a time.
Also, if you are not ready to paint your own sketches, you can use coloring pages which many online artists have been offering for free. As they say, there is no time like the present.
Sometimes it’s seems everyone has a tragic pet story they want to tell you. This is especially true if you have chickens. I promise this isn’t that sort of story. This one has a happy ending, and a point. But if you really hate hearing people’s stories about their pets, then I’ll see you back in the next post. Because what follows is the story of my Himalayan cat, Luna. How she got lost in the woods, and how she was found. Also, how the experience taught me to never lose hope. Miracles can happen, but they are more likely to occur if we can stay open to them.
Many times, this occurs after we have completely let go of wanting the hoped for outcome.
If you’re familiar with the Sedona Method, or one of the other methods inspired by Lester Levinson, you will understand what I mean by letting go. For me, it’s imagining I’m a super hero standing on top of a tall building. And then I just allow myself to fall, with no fear. And knowing everything is going to be okay. When I release into this visualization, I realize that I’m not actually falling that fast. I can control the speed, or even stop or reverse it if I want to.
Two Cats in Need of a Good Home
Back in the early 00’s, my now husband and I were living in a small one bedroom condo in Seattle. Just before Thanksgiving, I was browsing a website called PetFinder. Many of my pets have been found here, and I think it’s a site my husband wishes he could block sometimes when it seems like our clan has grown too large, and I want to rescue just one more homeless cat.
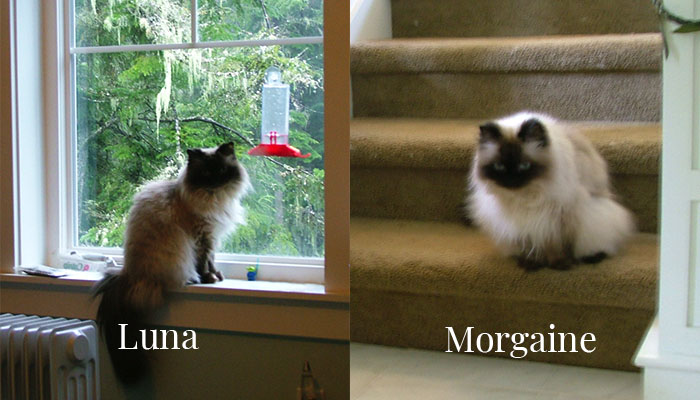
On this occasion, I typed in the search term, Himalayan, because that’s what our male cat was. Usually when I search for Himalayan’s they are senior cats. But this search brought of a photo of two sisters. And they were only 2 years old. They lived at a shelter on the same island our friends lived on.
When my husband got home, I showed him the picture. “I guess we could get two more cats,” he said, hesitantly. “But next weekend is Thanksgiving. So we’ll have to wait.”
I’m guessing he was partially so agreeable because there wasn’t much chance two young, beautiful, purebred cats would still be at the shelter in another week.
He was Wrong, and We Found Out Why
Morgaine and Luna, that’s what we named them, belonged to someone who was a Navy pilot. Whenever they went on missions, they boarded the two cats. Eventually, we were told, the owner of the kennel told them they should find them a better home. And that’s how they ended up at the shelter.
One of the shelter workers brought out Morgaine, the smaller of the two, and let me hold her. I could tell she was really scared, and wanted to get away. They were both really frightened, shy cats, but we decided to adopt them anyway. I still remember standing there, watching the worker trying to catch Luna to put her in the carrier, and wondering what we had gotten ourselves into. She was a wild cat!
Fast Forward 10 Years
Oddly enough, we eventually moved to the island our cats came from. It took us a long time to settle the two cats who had been left in a kennel so often in their youth. Even ten years later, they still didn’t like to be picked up. But they regularly came to us for pets, cuddle time, and playing with their feather.
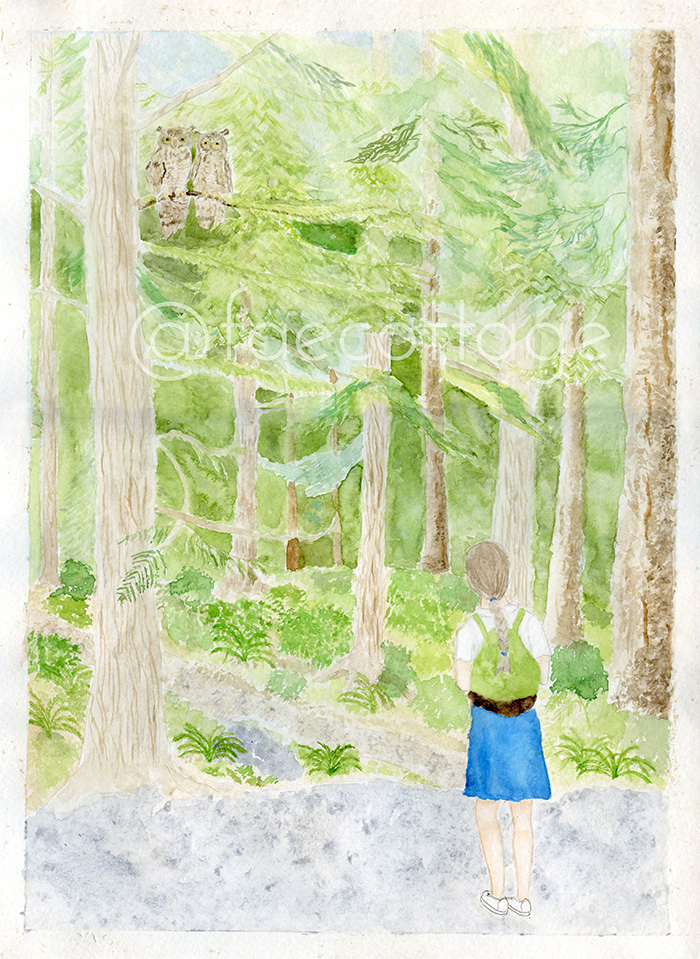
Our house is in the middle of a forest. We regularly see owls and bald eagles. And occasionally raccoons and coyotes. Outdoors is no place for house cats. Generally, our cats never showed an interest in going outside. They were happy watching the birds at the feeder, and napping in sunspots.
Which is why I was surprised, when my husband woke me one July morning just before he left for work. “I found Morgaine sitting on the front porch,” he said. “But I can’t find Luna. The back door was left ajar. I think she might have followed Morgaine out.”
If you have ever lost a pet, you know the frantic searching we go through, and the imagining of all sorts of unpleasant outcomes our mind creates for us as we are calling for our pet, and there is no response. It is hard in those times to never lose hope.
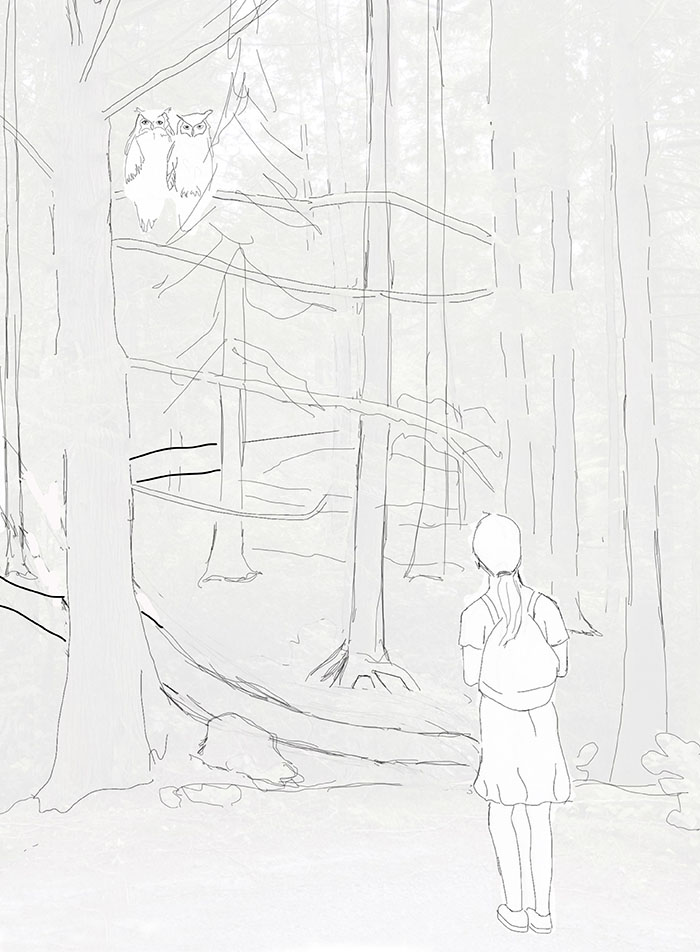
Here is Luna’s story:
I think I searched for hours. First in the house, because Luna was the scarier one. She generally spent most of her days under my bed. “She would never go outside”, I thought. I called my husband. “Never lose hope,” he reminded me. “I’m sure you’ll find her.”
After I searched the house from top to bottom, I started looking out side. I called the vet. “She would most likely stay near the house,” they assured me.
“That’s good”, I thought. Our forest is thick with salal and huckleberry for her to hide under. And who has a cat that will come when you call them?
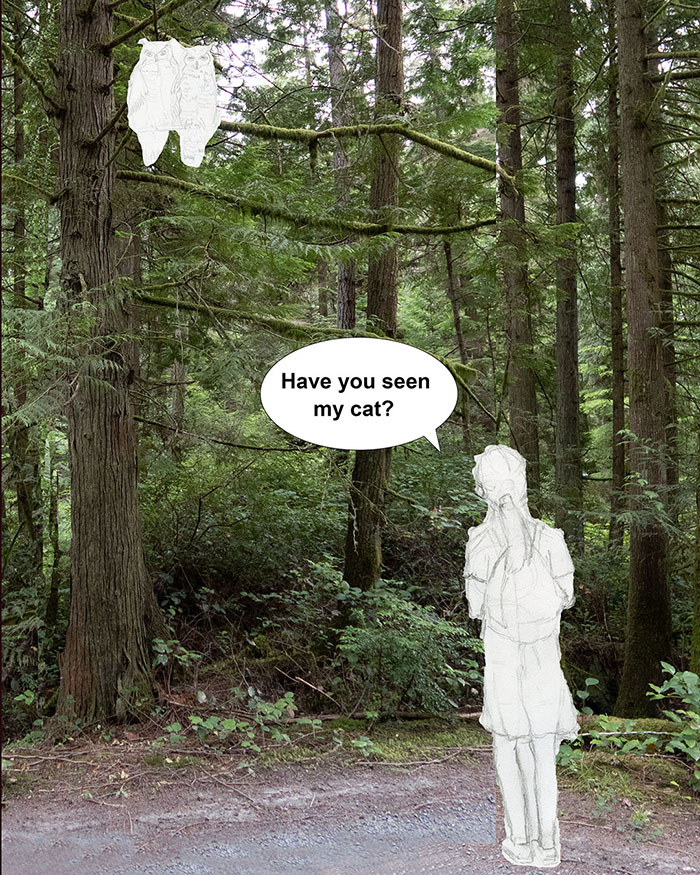
By 11:00, my “never lose hope” attitude was fading. I’d been in the forest for several hours calling her name. And crying. In the opening below our house, two great horned owls sat side by side in one of the cedars. I stopped and asked them, “Have you seen my cat?” I hoped they hadn’t.
I Called a Psychic for Help
At the time, my mom and I had recently read a book by Amelia Kinkade, Straight from the Horses Mouth. She’s animal intuitive, who helps find missing pets. In the forward of her book, she tells the story of how she helped Dr. Bernie Siegel never lose hope, and find his lost cat. So I started looking on the internet for a psychic who could help me.
The woman I found was local to the Seattle area, but when she called me back she told me, “I’ve never found a cat alive on your island. There are too many wild animals. But I’ll try. Never lose hope.”
Imagine hearing that! My heart dropped into the pit of my stomach. But it got worse.
A Few Hours Later, She Called Me Back
“I’ve talked to your cat,” she said. “And she told me what happened.” The psychic proceeded to tell me how Luna told her that she did indeed followed Morgaine out the back door. She was still close to the house, and just wanted to get back inside. And she was scared.
The psychic also told me she was standing between a light colored car and something with a big wheel. She thought it was a wheelbarrow. I stopped her there. “We don’t have a white car,” I told her. “And our wheelbarrow is under the porch stairs.”
“I didn’t say white,” she replied. “I said light. And there is something with a big wheel.” She then continued her story, but never stopped insisting that Luna was between a light colored car and a wheelbarrow. I continued to interrupt her saying there wasn’t a wheelbarrow behind the car. She was growing exasperated with me. “Luna said something grabbed her from behind. It was a coyote.” she finished.
I listened in shock as she went on to tell me that it was better to be snatched by a coyote, because they snap the necks of their prey right away. Owls play with their food.
My brain wasn’t registering all this. “Is she still alive?” I asked.
“No, she’s not. I’m sorry.” And then she hung up. So much for trying so hard to never lose hope. My cat was dead. Having a psychic tell me it was instant didn’t help one bit.
What I Saw Out the Window Shocked Me
I stood up and looked out the bedroom window to the driveway below. Parked at an angle was my mother’s silver Saturn. And upside down in the ditch behind was a wheelbarrow. The late afternoon sun that filtered through the trees reflected on the metal of it’s big wheel.
I stopped looking for Luna.
That Friday night was warm, and all the stars were out. I stood on the porch thinking about the song, “Somewhere out there,” and wondering where Luna was, or what was left of her. At the end of the driveway, those owls, maybe the same ones I’d talked to earlier in the day, were circling the forest, and making a lot of noise. “Luna would be so scared,” I remember thinking. “I’m glad she’s on the other side now where nothing can hurt her.”
The weekend came. I spent most of it in my room, reading, and crying over Luna. Morgaine, her sister slept snuggled next to me for two nights. Something she never did. She was grieving too.
My Son Never Lost Hope that We Would Find Luna Alive
On Sunday morning, my son, Sebastian, came running into my bedroom. “We found Luna!” he shouted. “Daddy needs you to come and get her.” My husband was standing out near the end of our driveway about 300 feet from out house. He pointed back into the woods, “We were moving the trash cans and Sebastian said to me, ‘What’s that white thing?’”
I looked where he was pointing. Next to a fallen log was something white and furry. Only Luna is a brown cat. I didn’t hesitate, but I moved cautiously so as not to startle whatever it was. When I got closer, I saw it was indeed Luna, however the hair on her back was much, much lighter.
There would only be one chance to get her. I inched closer, and then I lunged, grabbing her by the scruff of the neck. After carrying her all the way up to the bedroom, I set her down, and watched as she scurried under the bed. She came out briefly for food and water, but she spent 3 days under there, and wouldn’t let any of us get close. She only wanted affection from her sister. But Morgaine, who had be so distraught that she had slept cuddled at my side for two nights, hissed as this strange pale cat under the bed.
It Took a While for Luna to Return to Normal
Luna’s fur eventually returned to brown. My vet told me he had never heard of fur changing color before, although we know people’s hair sometimes turns white or grey from shock, such as a death of a close family member. Of course, their office also told me Luna wouldn’t stray far from the house.
We never did figure out what happened to her out there. Did something actually try to grab her? Maybe. That would explain why a cat who had never been out of the house would be found so deep in the forest. And why the fur on her back changed to white.
I’m happy to say, that was her last adventure. Luna lived 7 more years before she eventually died from old age at 12. She lost her sight, but she navigated herself around the house with such grace, you would never know she was blind unless you watched her carefully. And Morgaine eventually forgave her.
Some Things in Life Just Can’t be Explained
I told you, my tragic pet story had a happy ending, if not a logical one.
Thankfully the psychic was wrong, but she was also right. There was a wheelbarrow behind a light colored car. But my cat was alive.
I have since heard that many psychic won’t look for lost pets. Firstly, because more often than not, the pet is dead. But in addition, it’s difficult for them to determine whether or not the pet is dead or alive, since they believe they can talk to them either way. And sometimes when a pet is killed instantly, they don’t know at first they are dead. Therefore, after my experience, I believe some psychics can communicate with pets, and probably people too. Because I insisted to her there was no wheelbarrow, but she held to her story. And she was right.
Letting Go of Attachments is What We are Here to Do
This is what I believe anyway. So do the Buddhists. Some attachments are more difficult to let go of. For example, after I wrote my first post, Why Did I Wait so Long to Start a Blog?, we had to move my mother to a nursing home. In March of 2020 we were told my mother contracted Covid-19. Three times I received phone calls saying she wasn’t going to make it. I felt like I didn’t want to hold her here if she was ready to go. After recovering, she was locked in what seemed a never ending quarantine. But I still gave up hope what one day I would be able to hug her, and she would be able to hold her dog again.
Another example, I’m starting a new blog. Some people say, “It’s too late. No one is reading blogs anymore.” I’m letting go of the fear that I will never be successful. I will write it anyway.
So go ahead. Make your plans. Set your goals. Then release caring about the outcome. Do it the best you can. Never lose hope.
When we are facing new struggles in life, it’s helpful to look back at times in our lives when we had lost all hope, and then a miracle happened. I know, these times are rare. But what I have found is the more we believe they can occur, the more miracles happen. The thing that we thought was completely hopeless, or lost, appears in our life again. Just like my cat Luna who never had another adventure like that one and lived to the age of 14.
For a long time, there has been a lack of understanding about why some people can figure out the secret rules of realistic drawing, but many of us can’t. We are left longing for this magical skill that the few just seem to pick up so naturally as early as grade school. But here’s the real secret:
According to Betty Edwards, author of the bestselling book, Drawing of the Right Side of the Brain,
“Realistic Drawing is a learnable, teachable skill!“
This is fantastic news for the rest of us who wish to learn realistic drawing, and make beautiful characters!
Even though we didn’t gain the skills we desired in high school or university art classes, which left us more convinced than ever that drawing realistically is a magical skill only a few can master, we now know a contributing factor was the lack of proper instruction and learning how to see as an artist sees.
Can you imagine not taking a cooking class because you don’t know how to cook? But that’s the exact excuse people give for not taking a drawing class! And my college drawing class experience told me they were right. My drawing didn’t get one bit better.
Until I learned how to see.
If you have always wanted to learn to draw, but thought you couldn’t, download my free Drawing Warm-Up Exercise Worksheets to quiet your drawing critic, and allow the creative side of your brain to talk over.They are a great way to make drawing a daily practice!
Learning How to Draw is Learning How to See
What does that mean exactly? Well, think about it. When you are drawing something from life, you are putting a 3-dimensional image onto a flat piece of paper. You must create the illusion of depth, because there is no depth on paper.
For example, if you are drawing a figure, and the arm is bent, you need to use foreshortening to create the illusion. Otherwise, it just looks like a short arm.
Or when a road recedes into the distance, everything not only gets smaller, the lines of the road narrow. Objects close up appear larger, and they are also more in focus.
But don’t worry. If you really want to learn to draw realistically, you can train your brain and your eyes to shift into an artists focus. With regular practice, the shift happens easily.
Skill in drawing comes from the eyes + the brain. I remember my grandmother collected greeting cards done by a very talented artist who didn’t have use of her hands. She drew with her feet! It’s the brain that learns to draw, not the hands.
You are Never too Old and It is Never too Late
I put off learning to draw until after my son was born, because I thought it was too late to learn realistic drawing. Even though I started off majoring in art in college, I couldn’t draw as well as I wanted to. And I didn’t think I could improve my drawing either. After all, I’d already taken Drawing 101.
More and more universities and art schools have filled up with professors who do not know how to teach realistic art to students who do not already know how to draw, and unfortunately, I thought, my professor was among them.
Why does realistic drawing create so much fear and anxiety among many of us. After all, we can draw in the privacy of our own homes. We don’t have to show anyone our work if we don’t want to.
It’s our inner critique. We take it with us where ever go. And sometimes it seems like it never shuts up. It compares us to other more experienced artists, it tells us we’ll never be any good, and it’s too late to start anyway.
5 Ways to Quiet the Critique
The reason practicing realistic drawing for me is so enjoyable, is at some point my mind becomes really quiet, and I’m unaware of time passing. There are many ways to enter this no-brain state where we are no longer criticizing ourselves or comparing our artwork to others. My personal favorite from this list is number 5.
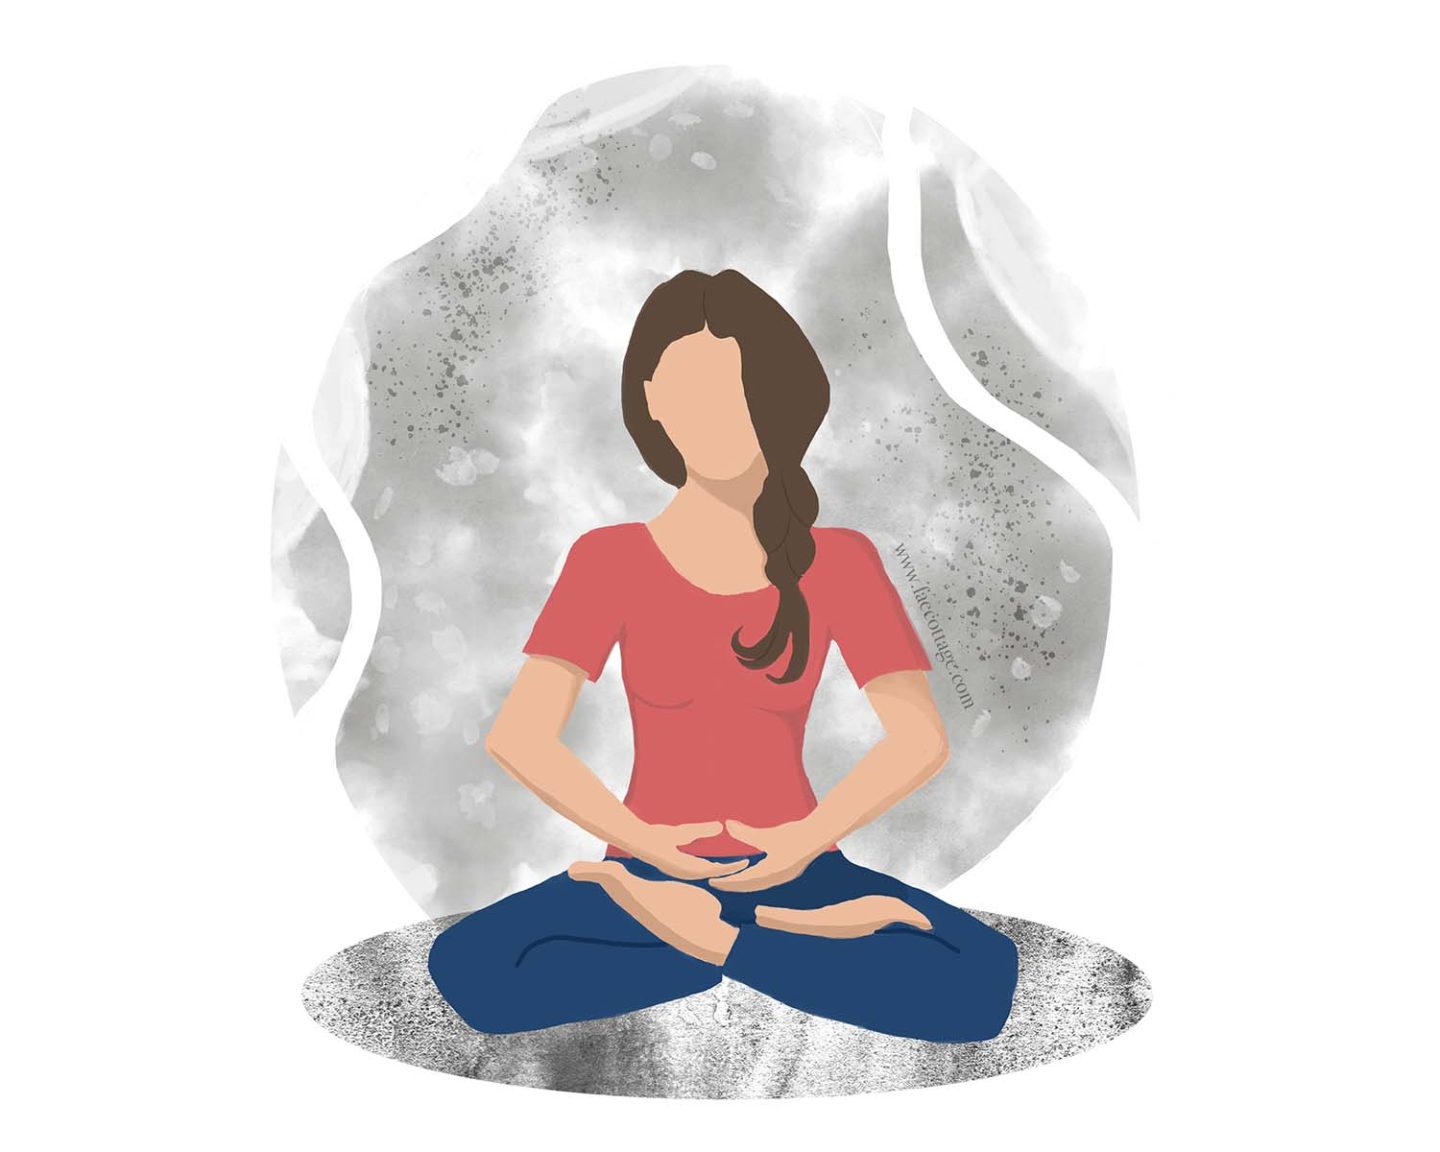
1. Meditate
2. Watch your thoughts and let them go
3. Yoga and Chi Gong
4. Working in your garden
5. Learning to draw, and shifting into the quiet creative brain mode
So put on your favorite indie/pop/smooth jazz playlist, and join me for some Drawing Warm-Up Exercises to quiet your drawing critic.
Your Right Brain already Knows How to Draw
But shhhh, don’t tell.
See, the left brain wants to stay in control. It wants to load our mind with lots of thoughts and criticism, so that we’ll give up. If there is one book I wish I could have read as a teenager, it’s Betty Edwards classic, “Drawing on the Right Side of the Brain”. That’s the book I used to learn realistic drawing while my son was napping, after thinking for nearly 30 years that I could never learn.
These are the important things I learned about the brain from this book:
Drawing is comprised of a set of skills, such as different line types, shading, etc.
Verbal thinking is located in the left brain, visual thinking is in the right
These are the components of drawing: edges, spaces, relationships, lights and shadows, and gestalt (the whole)
How to access the right brain, the R-mode and quiet the mind
Shift Your Brain into the R-Mode (right brain thinking)
One amazing thing for me that I love about drawing is that after a while, my mind becomes really quiet. I lose all sense of time, and I’m in the moment.
But to get to this phase, I have to go through what some call the bored brain gate. The left brain has to get bored, and fall asleep before we can have that quiet.
When we engage in exercises that the verbal half of the brain finds boring, first it gets really nosy, telling us this is boring, or even criticizing our work, however, if we keep going, after a while, it settles down and seems to go to sleep.
Then we’re in the drawing zone.
During these states, drawing becomes almost meditative, with a feel good sense of oneness, and freedom from worry.
If there is no other reason to learn to draw, then let this be it: because often the universe provides us with the answer we were seeking in other areas of our lives. Why? We stop trying to figure it out.
Four Ways to Shift into the Creative Brain Mode
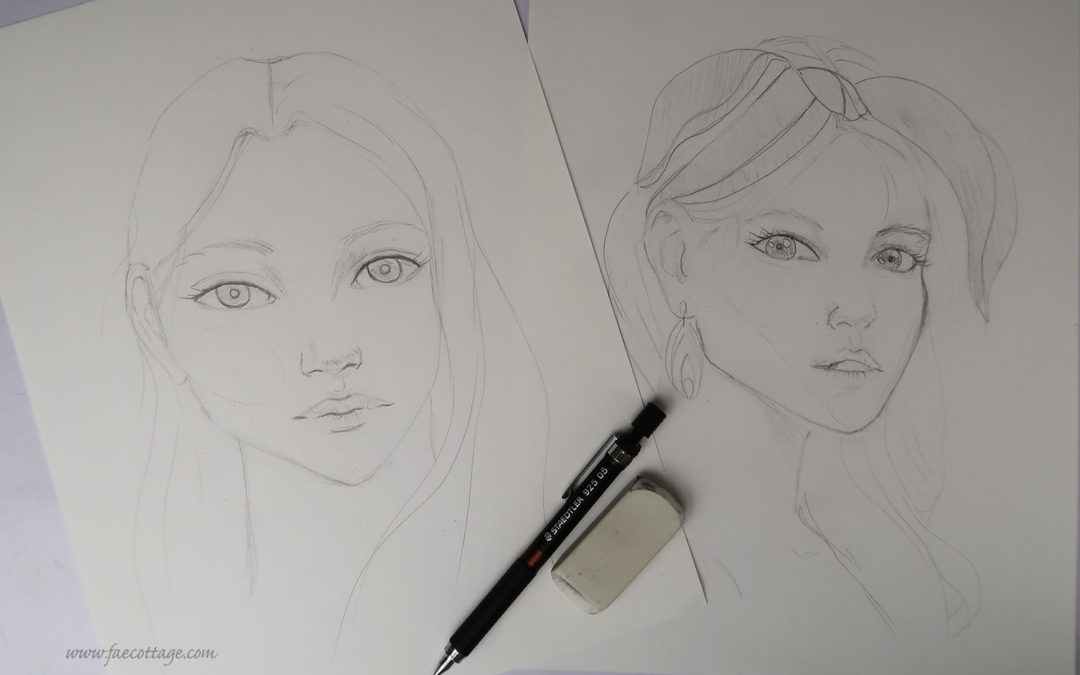
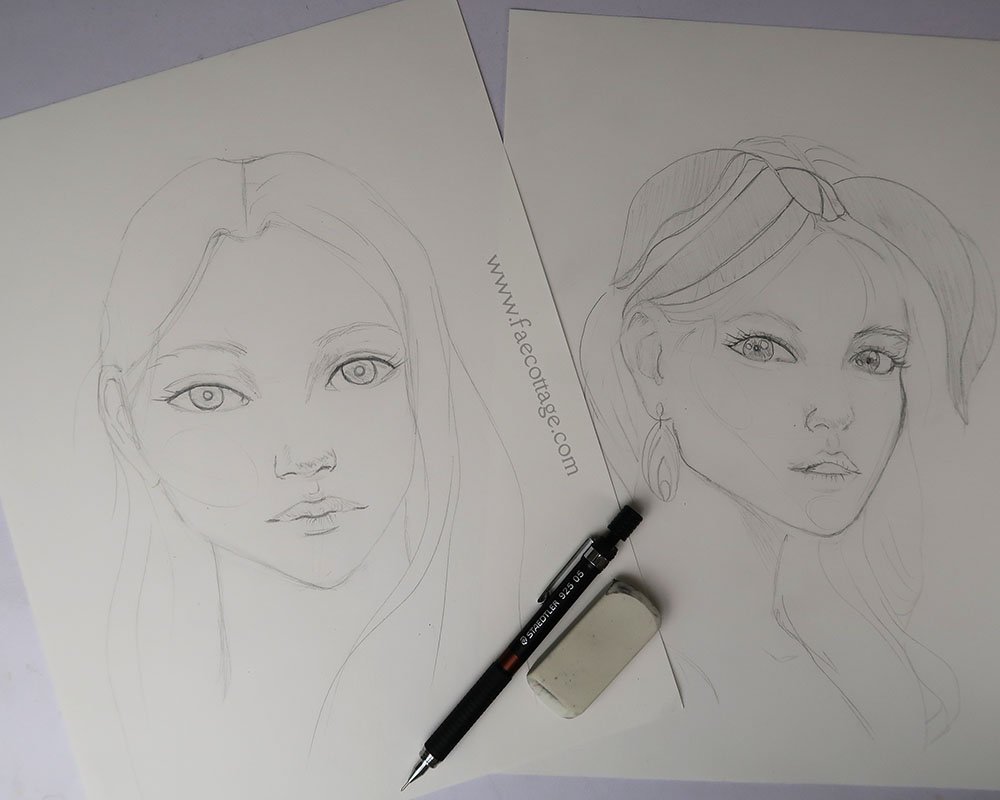
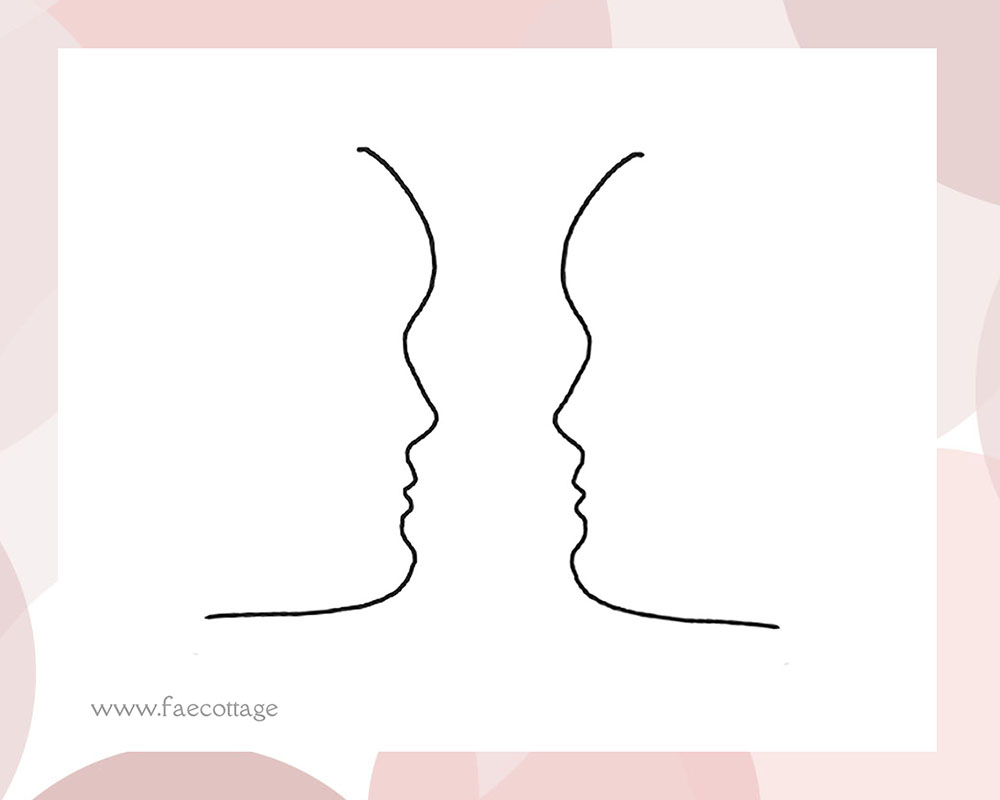
1. The Face Vase Exercise
This is one of the most popular exercises in “Drawing on the Right Side of the Brain”. First you draw the portrait of a face from the side. However, when you draw the opposite side of the face/vase, you are not allowed to name the parts of the face as you draw. Instead, you look at each angle, and try to copy it in reverse. The idea is that your left brain can’t do this, but your right brain can.
2. Realistic Drawing Upside-Down
When we turn an image over, and copy it, and in addition, try not to name the objects we are drawing verbally, it confuses the left brain. Instead of saying to ourselves, this an a nose, this is the upper lip, we notice the angle of the line, the amount of space between the lines. This is a longer exercise, as the book recommends allowing 40 minutes to complete, so it’s a great exercise in shifting into the quiet right brain mode.
3. Drawing With Your Opposite Hand
This is a technique I learned from a portrait drawing class I took. When you try to draw with your non-dominant hand, your attention becomes more focused on the movements of your hand. My teacher claimed that her students who tried this progressed in their drawing stills much faster.
Also, since most people are right handed, when you draw with your left hand, it’s directly connected to the right brain!
When my son was in elementary school, he took art lessons at a school based on Drawing with Children by Mona Brookes. This book teaches that there are 5 types of lines, which they practiced at the beginning of each class. I also begin practicing these line types as warmups, along with some other drawing warmup exercises that I rotate, so that I only do warmup practice 5 to 10 minutes before each drawing session.
Practice Realistic Drawing Warmups
Most of us wouldn’t run around the track, or start a tennis match before warming up our muscles. These drawing warmups stretches our creativity. They also put us in a more creative positive mind set. To learn more, check out my other post, Why Practice Simple Drawing Warmup Exercises.
Spending just 5 minutes each day practicing warm-ups can dramatically improve your drawings. And the best thing about these quick warm-up exercises is they are so simple to do, and they put your mind in a calm and creative state. You will be ready to tackle any drawing challenge.
Try out these free drawing exercises. You will receive 3 sets of worksheets. They include practicing the 5 lines types common in all drawings, reverse image exercises that are so important in drawing realistic faces, and more! Come join me for an artistic journey. It’s never too late to learn to draw!
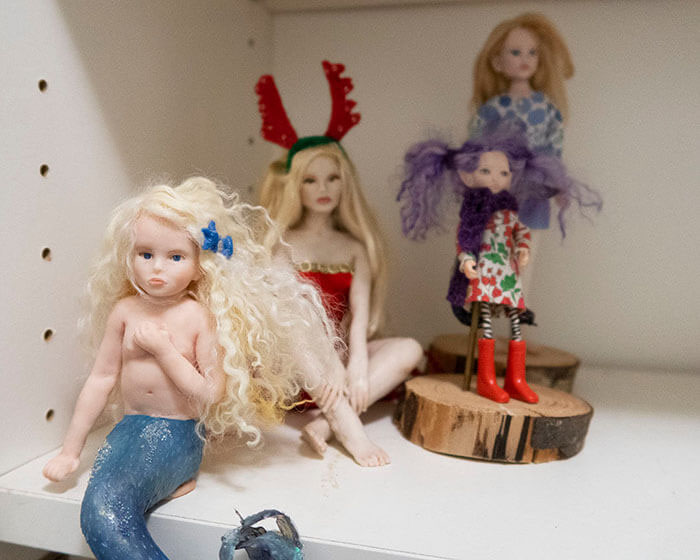
In my earlier post, 5 Valuable Things Sculpting a BJD Taught Me, I mentioned how I sculpt my dolls in both polymer and paper clay. Polymer clay is also great for making accessories for your dolls and dioramas. I will be creating some tutorials in the near future. But first, let’s talk about how to condition polymer clay.
I love encouraging other artists to work with polymer clay. But because of reformulation to make the clay less toxic, the plasticizers were removed several years ago. This makes proper conditioning of clay even more important.
Moonies are a curse of working with polymer clay. I mostly use Fimo Professional clay now for my dolls, and so moonies are less of a problem than in the past. But even with Fimo Clay, they sometimes happen if the clay is not conditioned or baked properly. And sometimes even when you condition polymer clay perfectly, they happen anyway. When making accessories, I generally use Sculpy Premo.
What are moonies, you ask? No, they’re not handing out pamphlets at the airport. Tiny bubbles that form as air pockets are called moonies in the polymer clay world. They magically appear when you bake. When you take your piece out of the oven, you might notice a lighter colored patch.
This is a moonie!
In a prominent spot, like the cheek of a doll, it ruins a beautiful sculpt. Sometimes sanding it away works. But if the bubble is large, sanding often opens up the air space and creates an ugly pockmark.
Finding the Perfect Clay
Some clays are more prone to moonies. if you ask a dozen artists what their favorite clay is, you will hear many different responses. Test several different brands yourself. That’s the best way to figure out what works for you and your oven.
I tested a lot of brands of polymer clay, but chose to work primarily with Fimo clay for dolls and Scuply Premo for accessories. Everyone’s experience differs because other factors contribute to flaws in your finished pieces. Examples are: how you condition polymer clay, oven temperature, cooling, and age of the clay can also cause moonies to appear. Even humidity increases risk of moonies. The types of clay I that caused the most trouble for me were Super Sculpey (the worst) , Sculpey III and Prosculpt. There are other artists who use these clays without any difficulty and recommend them.
Also, many of the manufacturers reformulated their polymer clay multiple times since 2008 to comply with new EU directives. This is good news and bad news. Polymer is now even less toxic, but because the plastisizers were in there for a reason, many artists are now finding that the clay is stiffer and harder to work with. If you have never worked with polymer clay before, my best advice to you is to try a few different brands and see what works best for you.
3 Ways to Condition Polymer Clay
When you open a new pack of it will often be really stiff. Even if it said soft on the package you will still need to condition polymer clay. Here are three ways that I have used to condition my clay:
1. Food Processor and pasta machine
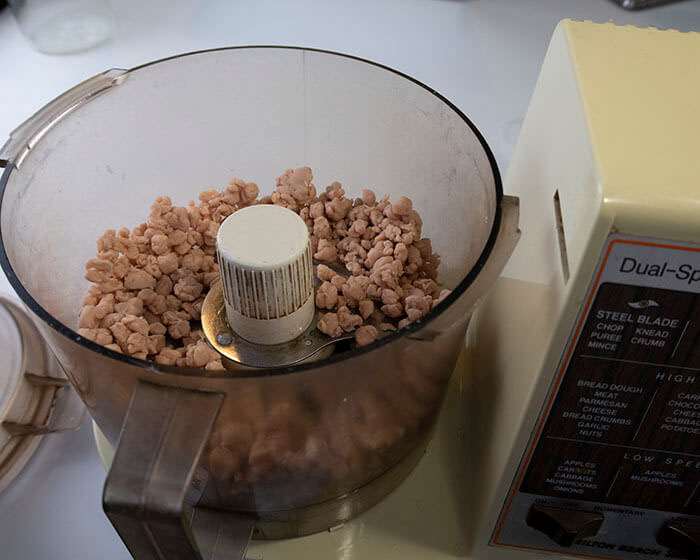
You need a food processor for this method that you only use for polymer clay. Check your local thrift stores. You can usually find a fairly inexpensive one. Either crumble or cut the clay into small pieces. Then pulse the food processor until the clay is softened into tiny pellets. Depending on your brand of clay, it’s age, and the method it has been stored, you might need to add a few drops of Sculpey Clay Softener.
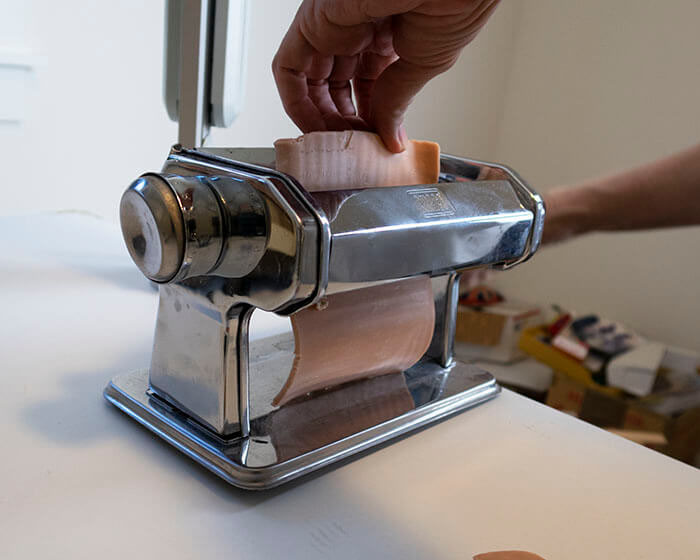
For the second part to this method, you need a pasta machine dedicated to clay only. Use an acrylic roller to roll out the clay like you would a pie crust. Start on the thickest setting. Fold the clay in half and run through again. This is where bubbles can get trapped between the layers of clay so press out from the center before you put the clay through the roller. Change to thinner settings as you proceed. My experience with the pasta machine hasn’t been good. I usually end up with a lot of small bubbles. I only roll clay if I need a very thin sheet, or if I am making a Skinner blend. And you can’t make Skinner blends without one!
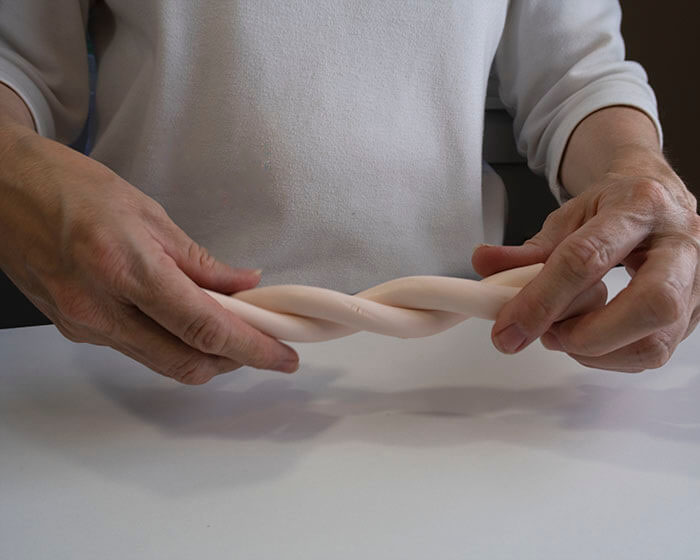
2. Hand twisting
First, break off a piece of clay from the block. If you are using one of the small squares, just split off a section. Roll the clay into a long sausage shape on a clean surface. I use a special glass mat. It’s easy to clean, and has helpful measurements on it. Then bend your clay in half and begin twisting. If I’m going to add a few drops of clay softener, I do it here. Twist until there is no air space between the coils. Then roll back out into a long sausage. Repeat this over and over until the clay is workable.
I remember sitting at the kitchen table with my mom when I first started to learn to sculpt. We spent a whole morning together conditioning clay.
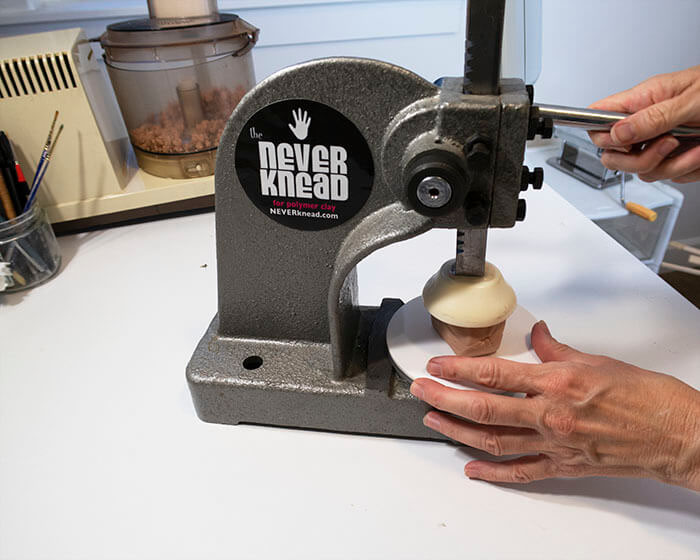
3. Use a press
After the manufacturer of Fimo clay changed their formula, I almost gave up sculpting. The new clay is so hard that it sometimes took me hours to soften a small batch. My son even said to me, “You spend over 50% of your time kneading the clay.” When I first heard about Never Knead press, I instantly wanted it. It really does speed up clay softening because you can put a whole block of clay under the press at once. I don’t think it is as fast as the seller of these machines advertises, but it is faster than conditioning by had.
The problems I have had with this press is that oil leaks from somewhere in the machine. It’s a tiny amount. It’s hard to even see where it is coming from. I wipe the tray and the press each time, otherwise, by the time my clay is softened, there is a dark marbled pattern in it. I have found the best way to prevent this is to wrap my clay in either a baggy or plastic wrap. This keeps the clay clean, but it slows things down a lot because I have to keep pulling the plastic off and re-wrapping it each time I press it. Hopefully they have fixed this problem. I purchases one of the first ones.
Those are 3 methods I tried to condition polymer clay. They all have their pluses and minuses. I think my favorite right now is the press, because I have shoulder and neck problems.
Otherwise I would just use the twist method and make sure my hands and surface area are really clean.
How To Keep Your Clay Clean
A really important thing when you soften your polymer clay is to keep it clean. Make sure you clean your surface first. You can use organic glass cleaner on your glass mat. My room is always well dusted and I run an air filter. Also, I usually wear a white shirt and light colored pants when I sculpt. Some people wear hospital gloves, but I think it interferes with my work.
In addition, I keep my hands really clean, especially under my nails. Even then, mysterious little fibers that must be floating through the air still get into my clay. It probably doesn’t help that I have cats!
Use a magnifying glass to look for fibers, and an x-acto blade to scrape them off your unbaked clay. Once you condition polymer clay, wrap it in Glad plastic wrap until you are ready to use it.
Do’s and Don’t for Baking Polymer Clay
Not only can baking your clay properly prevent Moonies, it can keep your piece from cracking. When I was just starting, some of the advice I received from other clay artists about baking was bad advice. These are my own personal do’s and don’ts.
Don’t:
Don’t mix brands of clay, especially if they have different baking temperatures.
Don’t start your clay in a cold oven and then let it heat up. It is meant to be baked at a set temperature for a set amount of time. You don’t know how long the heating up phase will take.
Don’t bake at a lower temperature for longer, or a higher temperature, thinking these methods will make your piece stronger. Baking above the recommended range can release toxic fumes, or burn your work. The clay manufacturers have tested the clay over and over. Follow the directions they give.
Don’t harden part of the piece, like the hands or feet, before baking with a heat gun. You have no idea how hot the clay is getting. Small bits, like doll fingers, burn easily.
Do:
If you are using your home oven, either bake inside a large dutch oven with the lid on, or wipe out the oven with vinegar before using again for food.
Do bake the recommended time in a pre-heated oven. And check your ovens temperature with a thermometor. For example, mine is 25 degrees hot. When the timer rings, turn the oven off and open the door a tiny crack to let heat out for 5 minutes. Close door again and leave until completely cool.
Do be very careful using a heat gun to set heat-set oil paints. You can still have moonies show up.
Do look at your work under a magnifier before baking. It’s easier to fix something before it has baked.
It’s okay to bake something in stages, but follow the recommended time even if you plan to bake again.
Don’t forget to remove your work from the oven after it has cooled. Otherwise, someone might come in, put on the temperature and never think to look inside. This was a lesson learned the hard way!
Tips for removing moonies:
If it is not too deep, sand it out.
Try a heat gun to heat the area, and then press on the warmed clay with one of your wooden sculpting tools, squeezing the bubble out. This has never worked completely for me, but if the moonie was on an area like a cheek, I have been able to minimized the moonie until it wasn’t as noticeable anymore, and then apply blush.
One more thing I want to mention before the end is adding small bits of clay to your piece increases the risk of moonies. Try avoiding that by adding larger pieces of clay, and then shaping with your tools.
Now Get Ready to Sculpt Something!
I hope this information will help you to get your polymer clay ready to use! Stuff still happens, and moonies are a fact of polymer clay life. We aren’t firing our work to perfection in commercial ovens, so it may not turn out perfectly every time. But by following some of these suggestions you can better condition polymer clay in less time.
Comment and let me know what type of polymer clay accessories would you like see tutorials for!
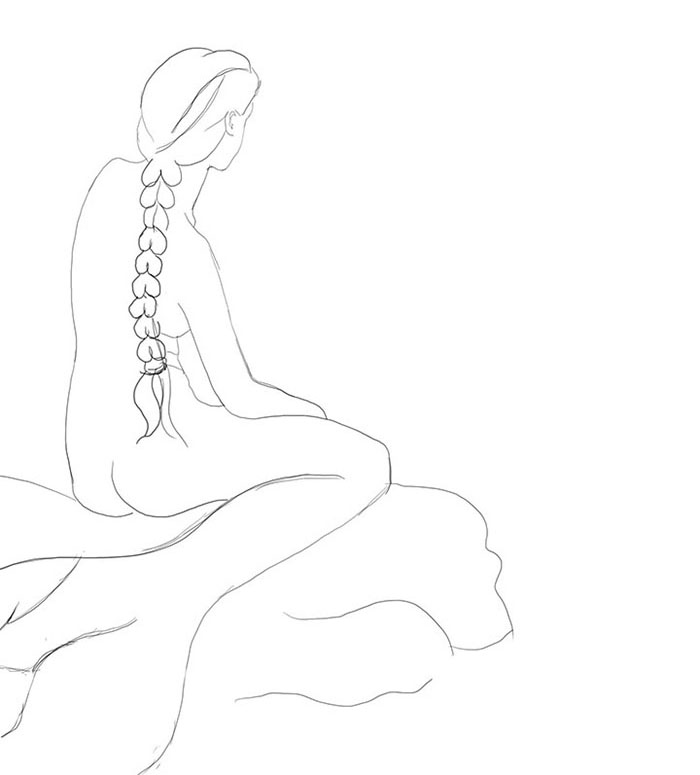
Last month I was busy working on a couple of watercolors for the #mermay2021 event on Instagram. But I’m a slow painter. Even my sketches sometimes take me a few days to complete. And so, I never finished my second painting until now, near the end of June.
What is MerMay, you ask? It’s described as “a month long celebration of creativity”, on the official Mermay site, and was started by Disney animator, Tom Bancroft. He is best known for his creation of the dragon, Mushu, in Mulan.
The site had 30 prompts for daily drawing ideas, and a contest in partnership with Wacom drawing tablets. If you saw a lot of artists posting mermaids on Instagram, and didn’t know what’s going on, don’t feel bad. I didn’t either.
I’m rather sorry I didn’t know about the contest. Maybe next year I’ll think about finding the proper hashtag and entering.
I just knew that I love mermaids, and it was an excuse for painting some. However, as I was getting ready to post photos of my 2nd mermaid painting on Instagram, I discovered that June has been designated Orca Action Month for more than 10 years now. That’s a good thing, because Mermay was over. It went by fast!
Do you Remember What You Cared about When you Were Younger?
It seems as we get older, we get caught up in our own lives, our families, or our careers. We stop paying attention to causes we cared about when we were younger, or in college.
Last week was my son’s final week of online classes. I decided to listen in on his English class, and overheard his teacher asking the teenagers what they planned to do over the summer. Someone was interested in volunteering at the local animal shelter, so the discussion turned to what volunteering the students might be able to do while our state not fully opened.
We are most likely planning to home school again next year, so as I was listening, I was thinking about what kind of volunteer work my son and I could do together as things open up again. For example, there’s a local cat shelter, a food bank that maintains a large garden, and the local library, who are always looking for volunteers.
But there are also many things we can do from our homes, whether it is writing letters about a cause we care about, or changing some aspect of our lives to be more inline with our beliefs.
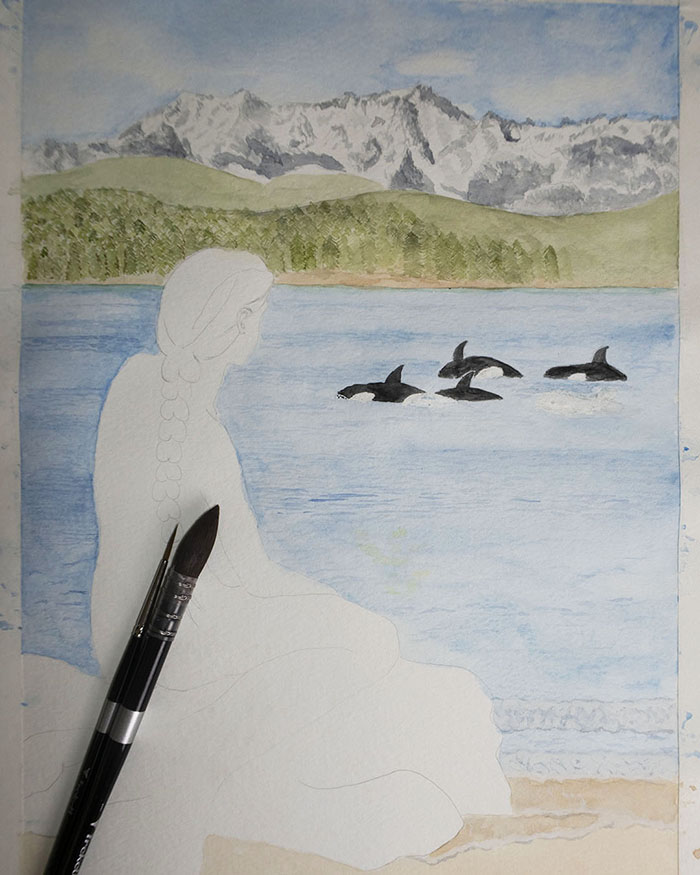
One thing I really cared about in college was dolphins. So it was by chance my mermaid painting was as much about orca whales as about mermaids. This is what inspired my watercolor. And the thing I dream of doing is sharing my love of nature and the environment through my paintings.
A Rare White Orca Visits Puget Sound
When I was looking for an idea for my second whale painting, I learned about a white orca whale that has been spotted this spring swimming with one of the pods.
This killer whale isn’t an albino, nor is it truly white. His name is Tl’uk, which means roughly, “pale moon”, in Salish. He is actually a palish grey. I haven’t seen an explanation for his coloring.
But he’s unique, and beautiful. In April, he was first seen swimming with his transcient pod in Puget Sound by a local resident who sent up a drone to get a better look at the group swimming by. It caused a lot of excitement around here.
This same pod also had an up close encounter with a group of people standing on a dock just a bit north of where I live. The sighting of this rare white orca brought a bright spot in the dark days of isolation to my island.
Here is an interesting thing I learned about the transient pod, so named because doesn’t have a designated territory like the other groups which are called the Southern and Northern Resident Killer Whales. The transient pod feeds on marine mammals such as seals and sea lions, not salmon. This pod spends a lot of time in Alaska, and off the coast of Canada. This is Tl’uk’s first appearance farther south in Puget Sound. He was born in 2018.
Are Dolphins as Intelligent as We Are?
Killer Whales and Orcas are just two names for the same species. And they are actually the largest species of the dolphin family, of which there are 42 separate members.
Scientists are still looking for the best way to measure intelligence. One way scientists measured a species intelligence in the past was by the size of their brain in comparison to the average size of their body.
Now days, some scientists are beginning to question this method due to high bird intelligence. Another way intelligence is measured is studying how much folding the brain does.
Neuroscientist John Lilly believed dolphins had a high level of intelligence, and did a lot of experiments trying to teach them language back in the 1960’s. Some of the experiments he conducted look quite unethical, and some of the orcas didn’t survive his study of them.
For a time, park of his work was funded by NASA. Their scientiests were interested in the idea of communication with possible extraterrestrial life we might one day encounter in the universe.
I was really fascinated by John Lilly in college, but didn’t really understand what he was up to, or about his experiments with LSD and dolphins. He discovered dolphins are not affected by LSD in any way he could determine, just as we humans don’t roll around on the floor when we smell catnip.
If this is true, that drugs affect different species differently, I can’t understand why pharmaceutical companies continue to test new drugs meant for humans on animals. If dolphins and whales are as intelligent as we are, or even if they’re not, some humans certainly have a lot to answer for in the way they have treated them, and how modern society continues to pollute their home with garbage islands of plastic floating off the coasts of China and India, large oil spills, and nuclear radiation spilling into the ocean.
Here in Puget Sound, the orcas are having a difficult time. Contributors to this are chemicals, fertilizers, and even prescription medications found in the sea water; over fishing of salmon, and dams blocking salmon returning to their spawning grounds; and also the shipping lanes.
Positive Changes in How We Relate to the Planet
However, other humans are making important changes in the way fish are caught to ensure dolphins, and other sea life, aren’t caught in their nets. The dolphin safe logo is common now on most major brands of tuna. Also, tuna more commonly are line-caught on a large scale commercially.
If you are a vegetarian, you might not think this is good enough. But only in the 1950’s, dolphins were considered vermin and competitors to many fisherman. They were killed indiscriminately.
Whaling has greatly decreased with only a handful of countries still participating. And many people are working to improve the whales habitat. In Washington State, two old dams on the Elway river in the Olympic Mountains were removed in the 1990’s to allow salmon to return to their spawning grounds. Habitat restoration has been ongoing.
5 Things You Can Do to Help the Orcas and the Oceans
Drive less. Take public transportation if it is available. The runoff from our cars often finds it’s way into larger bodies of water through both underground and above ground streams. Also, these streams are the drinking source for many animals.
Get involved in habitat restoration or beach cleanups. A lot of these are shut down right not, but you can always carry a bag and pick up trash when you are walking along the beach.
Don’t dump medicines into the sink, toilet, or garbage. Like the oil from our cars, these medicines find their way into larger bodies of water. In 2018, they found traces of the opioid, oxicodone in bay mussels in Puget Sound.
Support salmon-safe businesses. These include farms, vineyards, and also businesses active in restoring the urban watershed.
Plant a rain garden. They reduce water pollution, prevent flooding, will increase your home value, and make beautiful, low-maintenance areas of your garden.
Someone Should Do Something, Maybe that Someone is You
I used to donate to big environmental organizations. It made me feel good, and I got free calendars for life.
But then I looked closer into where all that money they collected was going. I also looked into who ran them. And I decided to donate to smaller charities, closer to home.
We can all make small changes in our choices, and together those small changes add up to a lot. One of the biggest choices we can make is where we spend our money.
For example, my favorite salad dressing stopped using glass bottles, and switched to plastic. I switched to their competitor, but also wrote them telling them why.
Not everyone can, or wants to be an activist. And a lot of the activists out there don’t speak for me. On many issues I’ve been part of the silent majority, but it’s time for the rest of us to speak up, and not let the few speak for us all.
We might have differing opinions on different issues, but we all deserve to be heard. I’m an introvert who likes a quiet life, so sometimes I like to let my paintings speak for me.